On the Fourth, we had so much fun playing with sparklers. We skipped watching fireworks altogether, although there were plenty to be heard in the neighborhood. Right before dinner, we made an emergency run down to the place where they were selling fireworks and picked up a giant pack of sparklers.
We decided to spell things out with the sparklers and record it on camera. We were super excited for that sun to go down. My sister and her friend and I just sat out on the porch waiting for the sun to finally drop and for the sky to turn dark enough for photos. Finally, after about three pieces of brownies (each) and giant slices of pie with ice cream, our wait on the porch was over.
It’s not terribly hard to take the pictures at all… and the effect is just awesome. After posting one of the pictures to Instagram (omg it made the popular page!!!), I was flooded with emails and comments and tweets on how to do it. I honestly think that this is a fun thing to do… even if it’s not the Fourth. It’s a great summer night activity. You can go for hours experimenting with new techniques and multiple people!
You do need a few people to help you out though. The more the merrier. Our dad joined in (because apparently writing with sparklers was one of his unfulfilled lifelong dreams), as did our mom and grandma and another friend who stopped by.
****
WHAT YOU NEED:
People (4): (Because it was drizzling outside, we had to have an extra person holding an umbrella over the camera.) So we had: one person manning the camera, one person holding the umbrella, one person lighting the sparklers, and the last person was the one doing the writing.
Camera: We used my sisters Nikon D3100.
Tripod: You really need to have the camera still, but you could also rest it on something (like a brick ledge or an outdoor table) if you don’t have a tripod.
Sparklers: We got the sparklers that don’t burn all the way down. I highly recommend them. I think they’re like safety sparklers or something. You’re writing in the dark… so you can’t exactly tell when that flame will get to the bottom. Better safe than sorry.
Lighter/Matches: Either work. Lighters are probably easier!
(Optional: Umbrella, if you’re like us and live in a super rainy area!)
****
CAMERA SETTINGS:
Before you can get started with the writing, make sure you have your camera settings all good-to-go. We only had to experiment a tiny bit before we were ready! (And honestly that was more to do with the writing technique than the camera settings!) Don’t forget to make sure that the camera is tightly secured on the tripod. It shouldn’t take wiggle at all when you release the shutter button and move your hand.
Put your camera on Shutter Priority Mode. That will allow you to control the shutter speed (which is how long the shutter stays open). We played around with the time and found that, depending on the word, 10 seconds was enough. For shorter things, like drawing a heart, 5 seconds was plenty long. For longer things, like drawing the Zeta crown, 13 seconds gave us time to finish drawing!
****
WRITING TECHNIQUE:
This will likely take you the most experimenting. Stand with your body centered and directly facing the camera/tripod. Starting with your arm outstretched to the right and write backwards from right to the left. (The camera, since it’s facing you, picks up the writing left to right!)
If you’re right-handed, you’ll notice that you have much more space to write at the beginning than you do at the end of the word as your arm has to reach across your body. Adjust for that as you play around! Same for lefties, but you’ll have less space at the beginning of the word.
Cursive works the best! The camera picks up all of the sparklers movements, so you can’t stop to create space between letters. Keep the sparkler flowing and moving consistently and loopy!
In practice, the person lighting the sparkler would light it and then move out of the way back to the camera. The person writing would simultaneously position her hand where she wanted to start and tell the camera girl that she was ready. The shutter click is loud enough so the writer can hear it and begin to write when it clicks open. If she finishes writing before the shutter closes again, then she should just keep her hand still (holding the sparkler) and wait for it to close.
****
Here are some of our pictures!
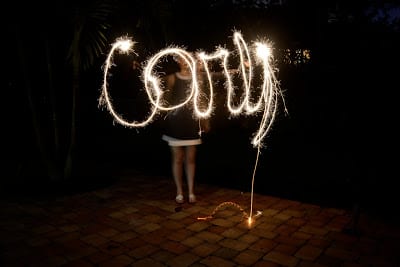
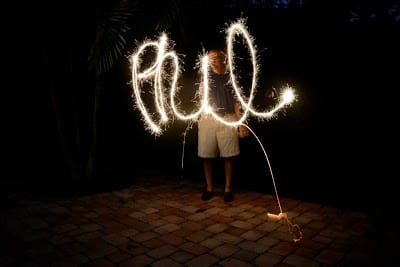
Writing backwards is a little tricky… I obviously struggled with that “y” at the end of my name!
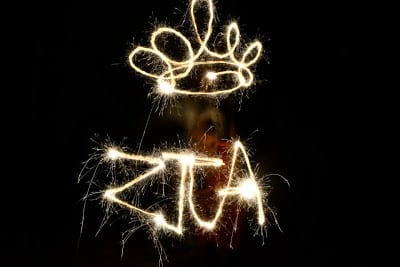
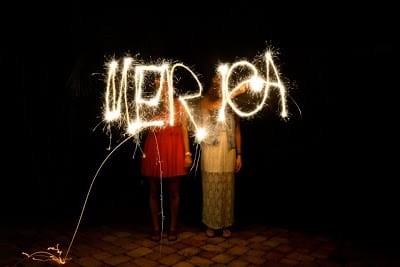
Stacy and her friend did this together. Monica drew the crown and Stacy was writing the ZTA. Teamwork makes the dream work.
My dad’s name!
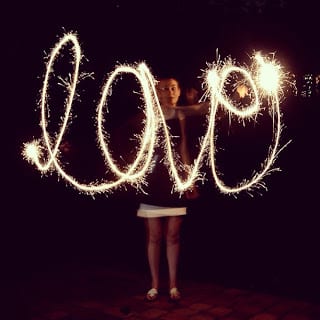
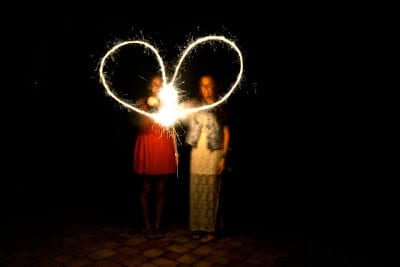
How cute is this?
The heart is simple and can be done by one person, but it’s adorable with two. This would be fun to do with a couple for a wedding or an engagement announcement!
Have you ever tried writing with sparklers?
xoxo







Your sister's a Zeta?! ZLAM!!
I've done this writing with sparklers before and you seemed to have fabulous results! Your pictures look amazing!
This is awesome! My boyfriend and I really wanted to try this sometime 🙂 The heart is perfect! Thanks for the great tips!
Hunter
preponabudge.blogspot.com
These pictures are great! 😀
The heart with sparklers is a great idea for a wedding announcement. Thanks, Carly!
omg, this looks super cool!!! i need to try it before the 4th of july weekend is over. Haha.
Join my $20 Firmoo e-voucher giveaway!!! (6 winners + 1 grand prize winner) 😀
🙂
Carrie
http://readmylifeascarrie.blogspot.com/
That looks amazing!!! I always wanted to know how, now I do!!!
Jenn
really want to try this!
thanks for the breakdown on how to do it 😀
xx
http://anoddgirl.blogspot.com.au
I've never tried writing with sparklers but it looks really cool. I've gotten into led hoop photography. You can make some ridiculous patterns: http://loveashley.net/2013/01/15/splendor/
super cute! I love taking photos like this. It's fun doing it with colored lights too!
This is so cool! My friends and I love doing this. It's so much fun, and the pictures come out looking amazing!
Xoxo,
Christine
Ah this isn't nearly as hard as I thought it was. I definitely want to try this sometime this summer!
Also Zeta love!!
love your sister's ZTA picture!
I love this, I've done it before with my Cell Phone. If you want your writing to look a bit better you can write the normal way and then just flip the picture when you upload it to your computer.
Mana
Fashion and Happy Things
This is so cool!
–Anne's Scribbles and Doodles
I just bought sparklers for summer nights and experimented with them for the first time last night! I was messing with the exposure, aperture and ISO on my camera but you said all you have to do is control the shutter speed – I'm still a newbie with my camera (I have a Nikon d3100 also), so is the "S" option on the dial the shutter priority mode? And what did you set it to? Thanks 🙂
Love shooting sparkler writing! I've done it many, many times! We've ended up with some pretty cool designs when I let the kids "take over". Also, you can let the person write normally, then flip the picture during editing. There's not much detail in the face or background to really notice that the photo was flipped. Thank you!
You actually don't have to write backwards, you can just write it normal then use photo shop or an app to flip the photo (:
You can write normally, left to right, and then invert the image. Way easier than learning how to write in cursive backwards.
How cool!
Happy Medley
This is awesome!!!
xx
http://www.manipineiro.com
Thank you so much! I’ve always wondered how people did this!
Wow! These are so good! Would it be possible to write your name the correct way (left to right) and then flip the image in photoshop?
Adorable! Great explanation.
Found this site and looked up how to write with sparklers….loved your post because I am a ZTA too!!!
Thanks for the tips. I have been searching for how to tips and find your tips to be the most detailed and helpful.
I have been trying without adding the flash and getting very blurred subjects no matter how still they tried to be. I will play with the off camera flash and hopefully get better results.
Thanks again for sharing.