
First and foremost, a huge thank you to Maria Gomez for the inspiration behind the candy cane bows. The second I saw them going viral, I knew I needed to make them ASAP. She is clearly very, very talented and made the process look easy peasy! I struggled hard, so I thought I’d share some of the tips that helped me.
If you’re looking for another DIY, I had the best time making salt dough Santa handprint ornaments with Jack!
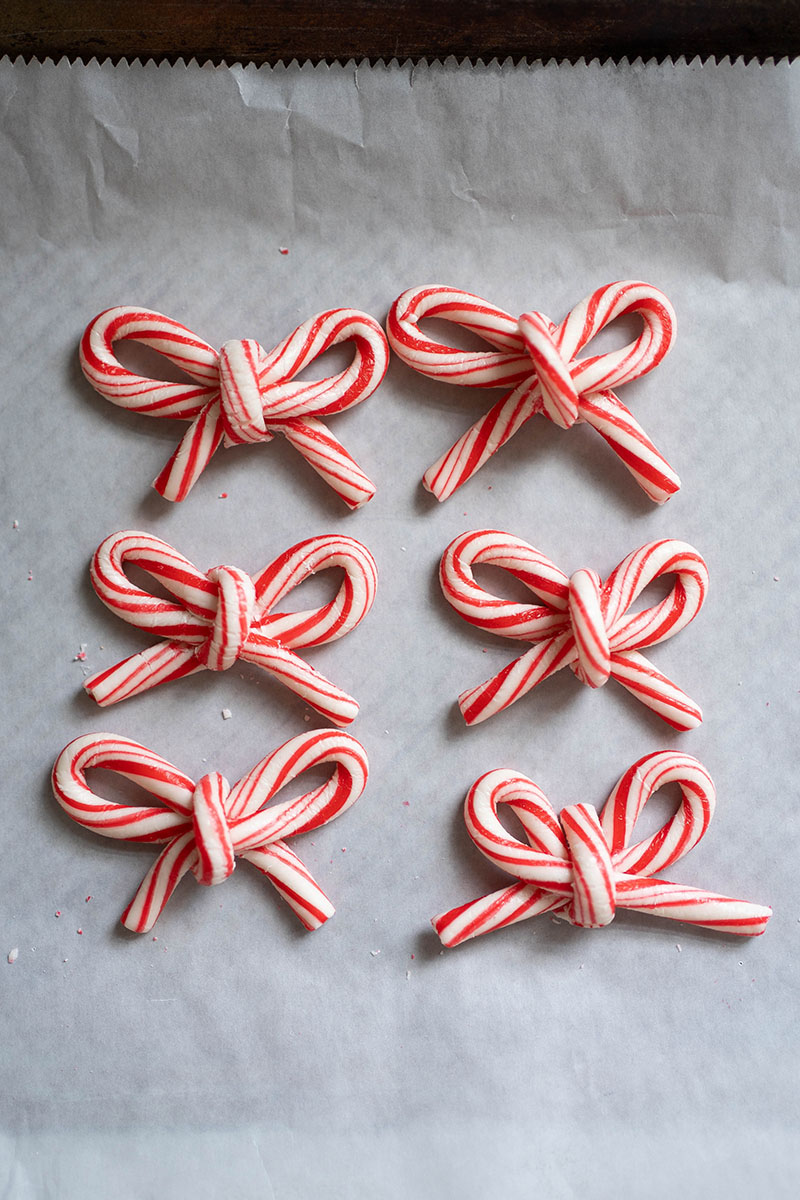
The idea is straight forward. You assemble two mini candy canes on top of each other, bake them and another candy cane until they’re malleable, and then take the curve of the third candy cane to create the tie of the bow.
In practice, it took some trial and error to get them just right! Here’s what worked for me:
DIY CANDY CANE BOWS
– Get the right candy canes! I went to four stores until I found the right size/shaped candy canes. Whole Foods’ candy canes were all broken (and organic and tbh I was skeptical if organic would have the right brightness), Walgreen’s candy cane’s were too small, Stop n Shop did not have any candy canes (!), and CVS’s were perfect! The brand is “Sprangler Mini Canes.”
– Perfect the tie! The original creator breaks the “curve” (aka tie piece) before baking, but when I attempted this, they all just kept breaking and wouldn’t stay put. I ended up baking the two candy canes in the bow shape and then baking a third candy cane and using a knife to cut the “curve” of it once it was warm and malleable and then adding it to the “bow.”
– Low and slow! I baked the candy canes at 200°F for about 6-8 minutes. You don’t want them to melt, but you do need to get them pretty soft. I would experiment with your specific oven as ovens can be finicky and multiple environmental factors can affect your specific baking experience.
– Work in small batches and work fast! I started by trying to do too many at once and found that it was easier to work in smaller batches. I wouldn’t try to do more than three at once, but I would actually start with one bow at first to get the gist/feel for it. You do need to work quickly as they immediately will begin to cool when you take them out of the oven.
– Don’t forget to flatten! Once you have your bow shape, don’t forget to give it a little press to flatten them against the cookie sheet or counter top (wherever you’re cooling them) so they cool and end up flat. It’s the cleanest look.
– It’s an art, not a science. If the candy canes don’t feel malleable enough, pop them back in the oven to continue heating. If they’re cooling too quickly, consider turning your temperature up.
– Expect burns and breakage! My fingers were a little sore by the end because the candy canes need to be hot while you’re working with them. I didn’t get real burns or blisters or anything, but expect a little bit of discomfort. The cuteness is worth it 😉 Also, expect a few to break, so if you have a set number you need to make, I highly recommend making more than you need.
– Don’t over manipulate! This is probably the biggest takeaway and not something you’ll come figure out until it’s too late. If you over manipulate the bows while they’re still warm, you put the candy at an increased risk of breaking when they cool. Think of it like a good cookie dough. You want to work it until it just comes together, but don’t overwork the “gluten.” The bows that I kept tweaking over and over ended up breaking when they were fully cool 💔
Let me know if you end up making these!! I’d love to know how they turn out!
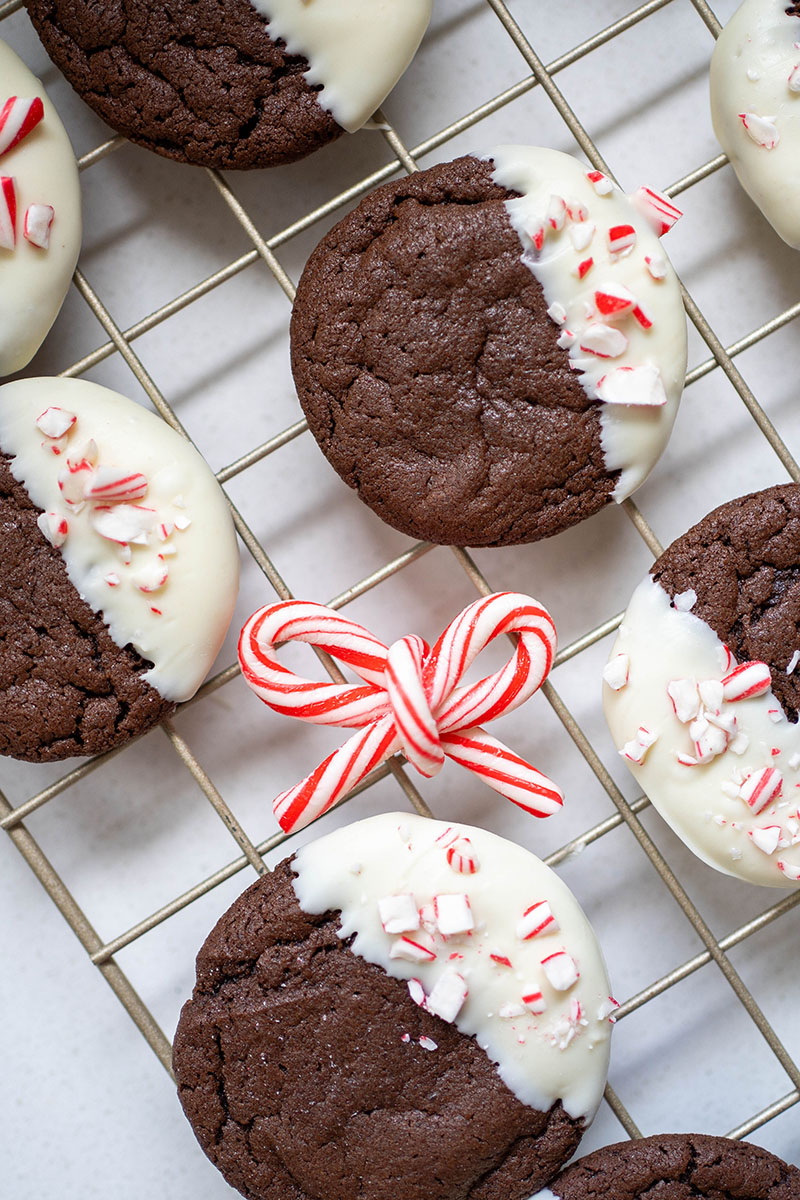
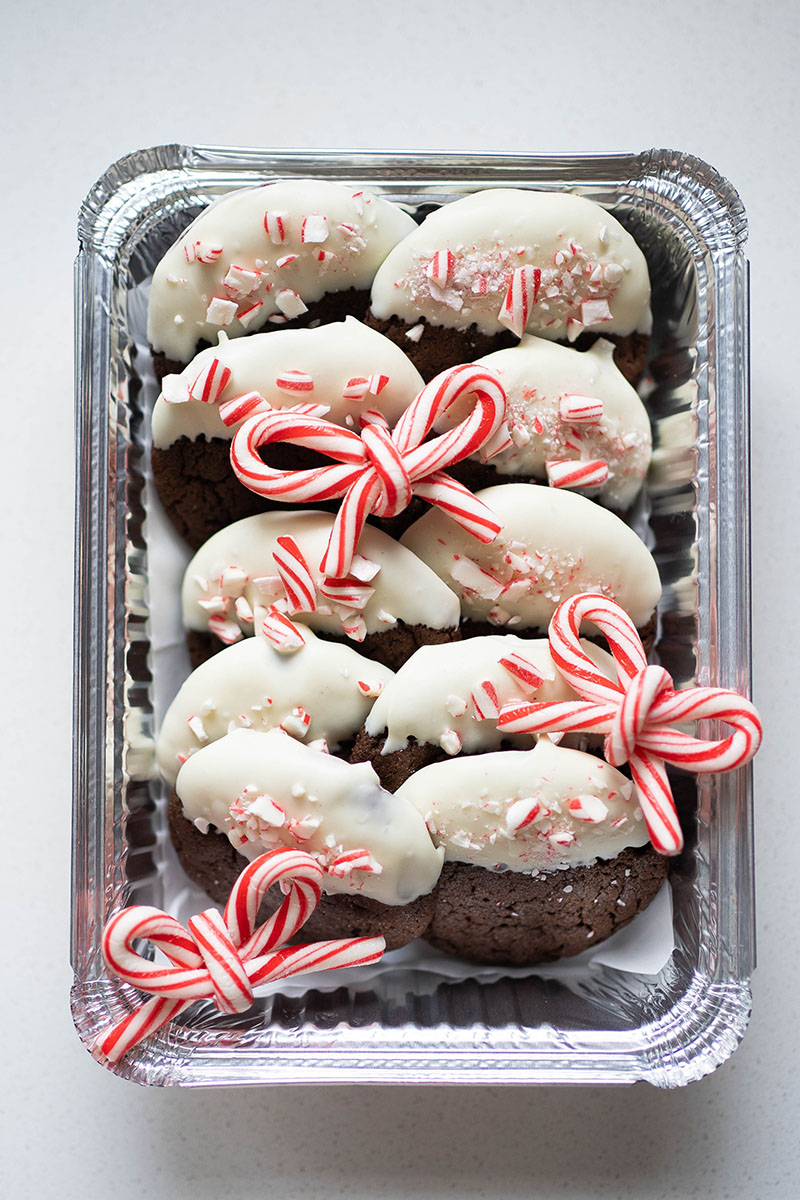
PS They’re the perfect garnish for these delicious chocolate peppermint cookies!


I love how festive these cookies are! Perfect for the holidays and i love the attention to detail!
http://www.elspethsdaybyday.com
These are so cute!
Made these bows and they came out so cute. I will use them in my goodie containers for Christmas. People will absolutely love them. I will make them again I’m sure. They were easy after reading about them.