
This is a very 2020 post for me. I’ve been on a major DIY/crafting kick. It started last year but now that we’re in quarantine, it’s only increased. It’s my favorite way to keep busy. Mostly because it gives my hands something to do besides endlessly scrolling through my phone. Things are slowly starting to open up here in NJ… right now we’re in Stage 1, but still have to stay home for the most part. So…. crafting it is 😂
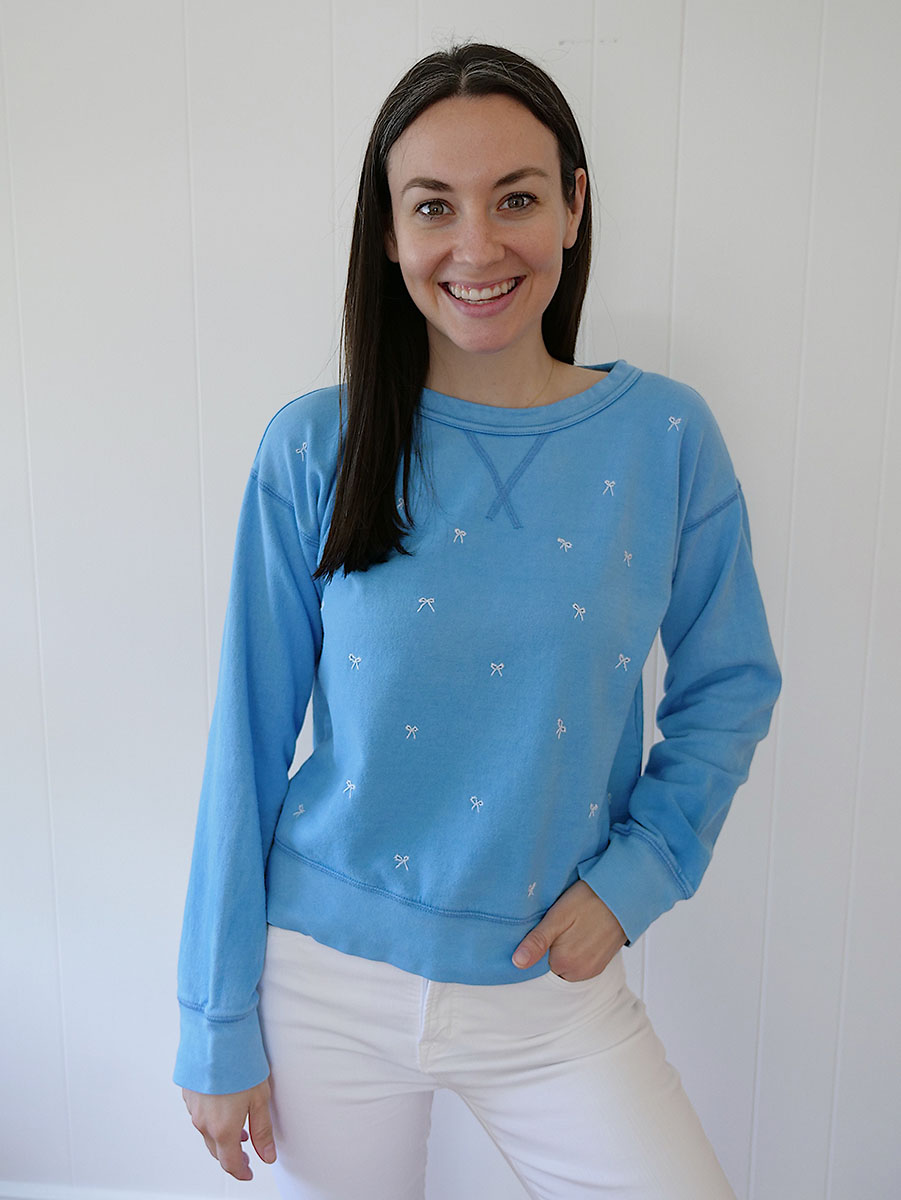
I loved this J. Crew sweatshirt by itself– it’s the perfect summer weight sweatshirt and right now sweatshirts are a significant part of my wardrobe. I did want to jazz it up a little bit. Originally I planned on embroidering a word or phrase on it, but spotted this strawberry t-shirt and was inspired to do a scatter print. It’s honestly super easy and not too much of a tutorial. I will share how I did it though in case you want to try your hand at something similar!

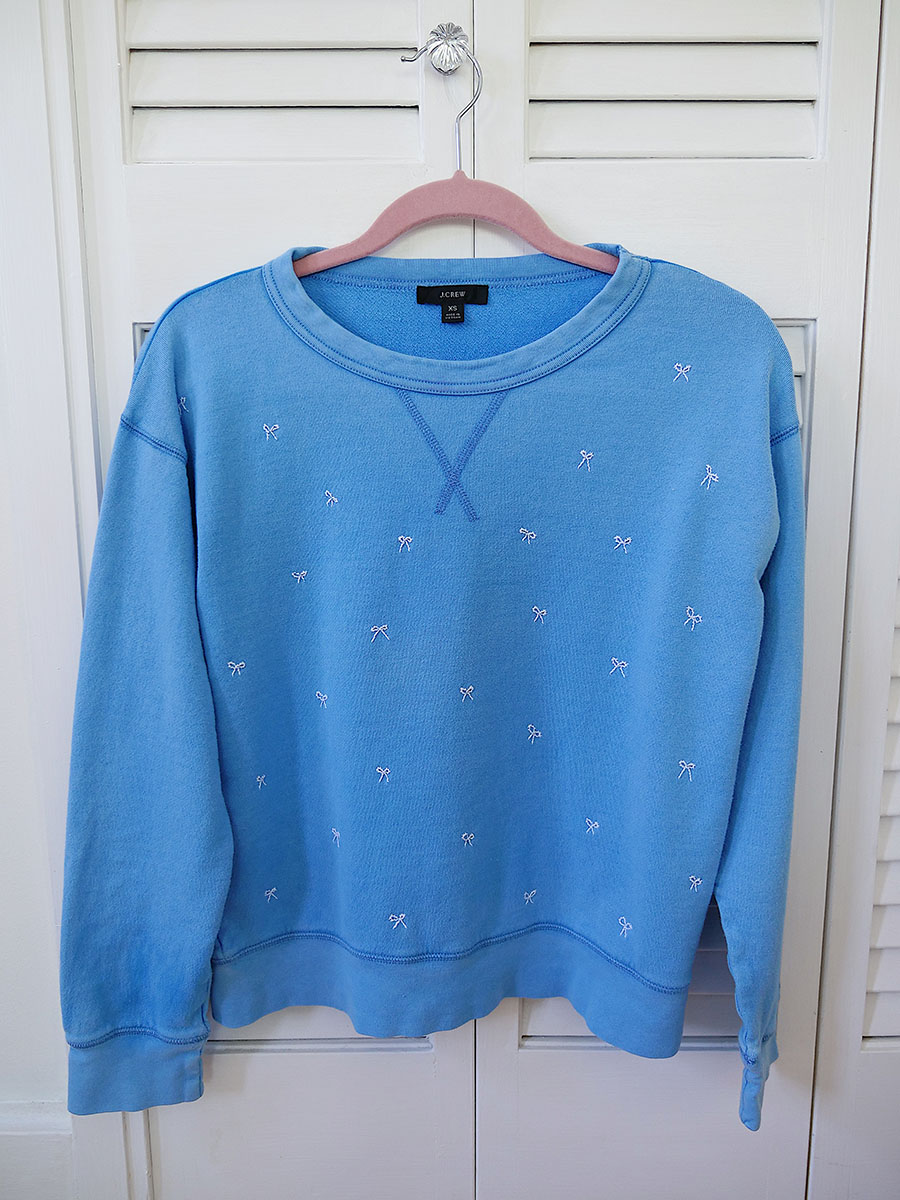
1. First, make sure you wash and dry whatever you’re going to embroider. This sweatshirt really shrunk after the first wash/dry so I’m glad I did it!
2. Figure out the motif you want. Think of something small and relatively easy if you plan on doing it by hand. Honestly the bow was super easy and it still took me hours to embroider the 20+ bows. I did about 8 bows a night for a few nights while watching TV. It helped to break it up.
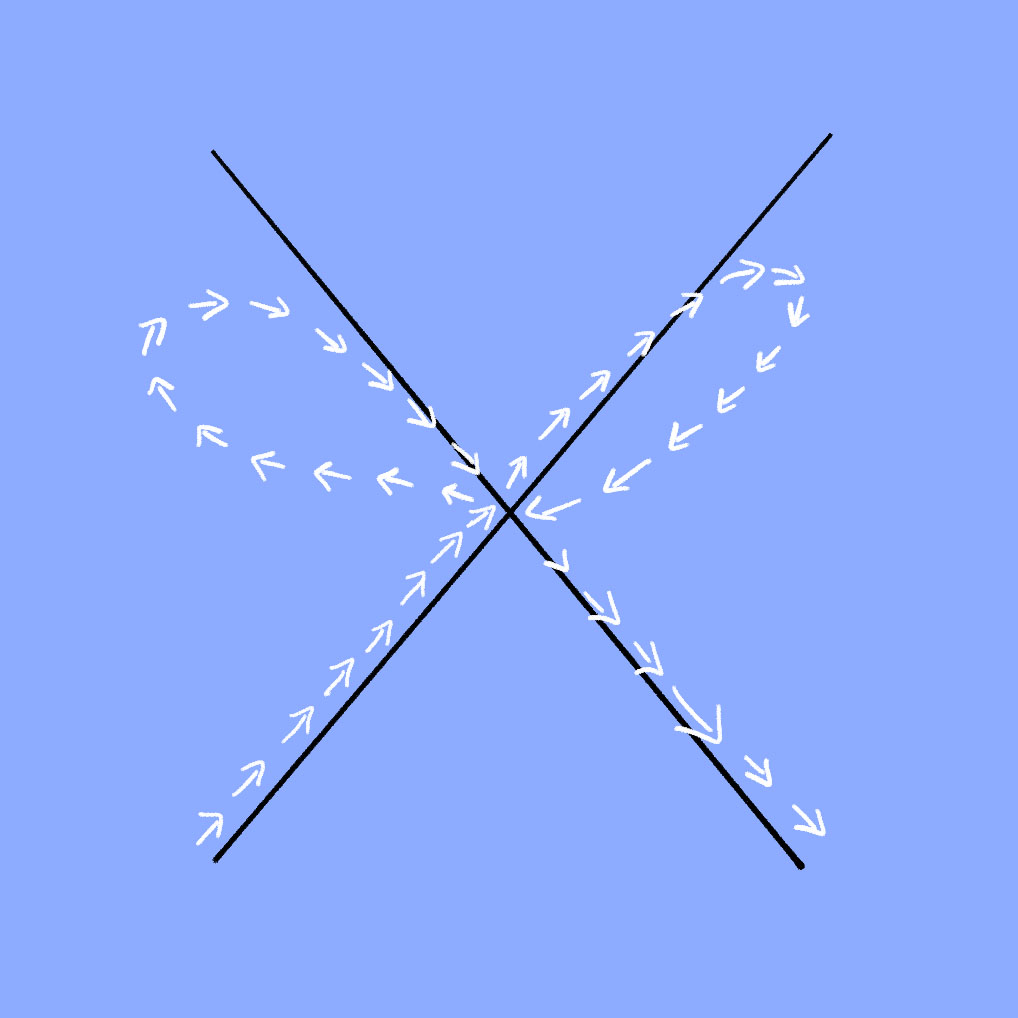
3. Using a water soluble marker, mark with Xs where you want to put every motif. I didn’t want it to look too perfect so I just randomly drew Xs trying to spread them out somewhat evenly.
4. I did not use a stabilizer on the back though I wish I had because this sweatshirt have loops on the back that made embroidering quite difficult. (Whoops!) I set up a small embroidery hoop, centering each “X”.
5. I’m going to assume you’re doing the bows, but I started at the base of the left side of the X and worked my way up and around in a bow pattern. The X was actually a fantastic guide for the bow. I recommend practicing a few times on a scrap piece of paper so you can get the hang of it. I did a stem stitch but feel free to do whatever embroidery stitch you think would be best. My bows got better as I went along because I was coming up with little tricks to make it easier. See below for the pattern– again I started at the bottom working up towards the center of the cross, then did the left loop, followed by the right loop, and then worked my way down the right leg of the X.
I love that since it’s hand embroidered, each bow has it’s own little personality. Some have long tails, some have short loops or floppy loops. Some are straight, some are crooked.
Voilà!! A personalized sweatshirt!


Adorable and clever. Love the color combo! I love how subtle the bows are also. Great job!
This is the cutest sweatshirt! I love the color.
http://alexagmarsh.blogspot.com/
This is such a cute and easy idea, I love how you made it your own.
http://www.elspethsdaybyday.com
This sweater is so cute and turned out great! I’d love to find the time to do this with some sweaters.
Super super super cute!
This is so cute! Love this idea.
https://petuniaspicks.com/
It turned out so cute! I’m going to try my hand at this soon – you’ve inspired me! Thanks for sharing.
That looks darling! I thought it was professionally done.
Hi Carly! Super random (and you may have already seen this) but I thought this was really interesting re: j.crew bankruptcy
https://www.npr.org/2020/05/22/861378110/j-screwed
I love this idea~ It must be really fun to try these simple stitches!
What a great idea. Love it. Hope to see this idea applied to a cute little dress for someone so cute. Would be adorable and I know you’ll master it.
This is so cute! You did a great job with the embroidery. I love that the ribbons are tiny and subtle! Thank you for sharing this as inspiration 🙂
Julia x
Last Post: My Favourite Instagram Accounts for Inspiration and Creativity | https://juliaspeaksbeauty.blogspot.com/2020/05/my-favourite-instagram-accounts-to.html
I have read this blog and I think that this is written very well. Thanks for providing good information.
New things always bring new ideas. This is something like that.